How To Design A Walk In WardrobeClosetMaid's SuperSlide shelving system is ideal for use in walk in closets. Whether you have a purpose built room, or are converting a spare bedroom, at Organise My Home we can help create your ideal storage solution. Our Free Design Service is a great way to get some ideas for an odd shaped space or for anyone looking for something different to our standard packages. Here, we talk you through how to design your own walk in wardrobe. If you're the type of person who knows what you like, then have a read of our tutorial and visit our Create Your Own walk in wardrobe section to order all the shelving and hardware you need to transform your closet!
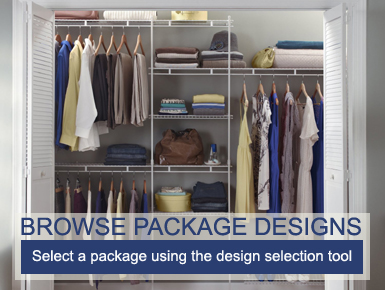
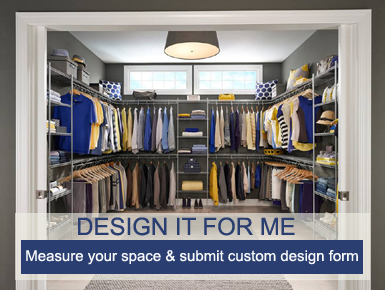
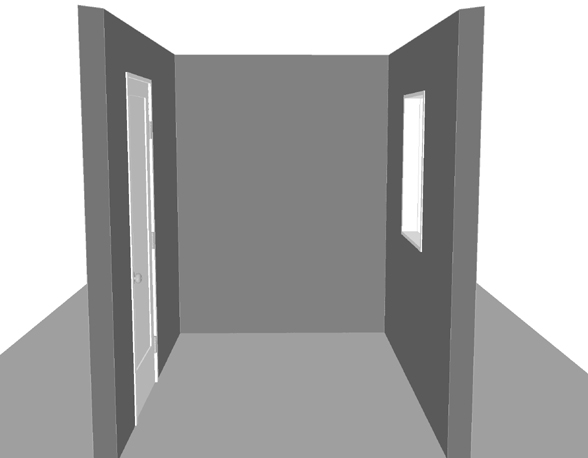
Not ready to give it a go on your own? Take a look at our walk in wardrobe section where you can select a package to suit your design and size requirements! | Step One - Measure your space - Before you start planning your space, you need to ensure you have all the correct measurments. - All measurements are shown in imperial and metric units to make it easy for you, whichever you feel more comfortable with. - You'll need to measure each wall in the enclosure, and we recommend that you do this regardless of whether or not you plan to place any shelving/ hanging sections along every wall. This is because it will give you a good overall idea of the space that you will be left with once garments are in place, and it will also help you determine whether or not you can fix shelves at each side onto adjacent walls for support. - Measure the height, and width of each wall. - Also note the position of any light switches/ sockets. These typically will be adjacent to doorways or at low level so won't get in the way of fixings, but it is important you think about where the cable will be in the wall behind these items so that when you come to install they do not pose a risk. | | 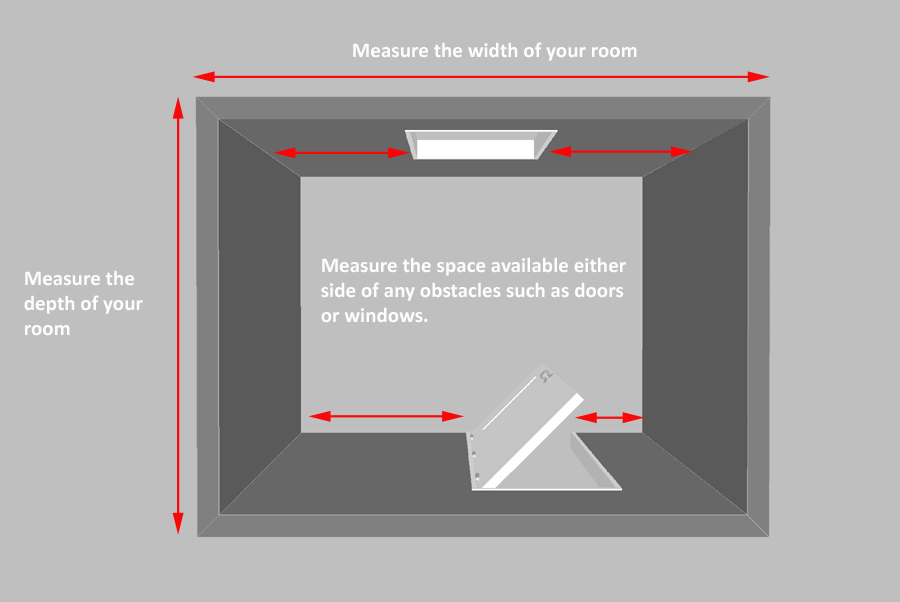 | | Step One - Measure your space (cont'd) - Make sure that any obstacles, such as windows/ radiators/ doors/ picture rails etc. are also taken account for. - Measure the dimensions of these obstacles, but more importantly the space around them. - In our example, we have placed a window along the rear wall. We've measured the space above and below to determine whether or not we can place further items here. - We recommend you do the same either side of any doorways. This will allow you to determine how much space you have either side of the entry way, so that you don't cramp the space, and also whether or not you can fix the ends of shelves here for additional support. | | 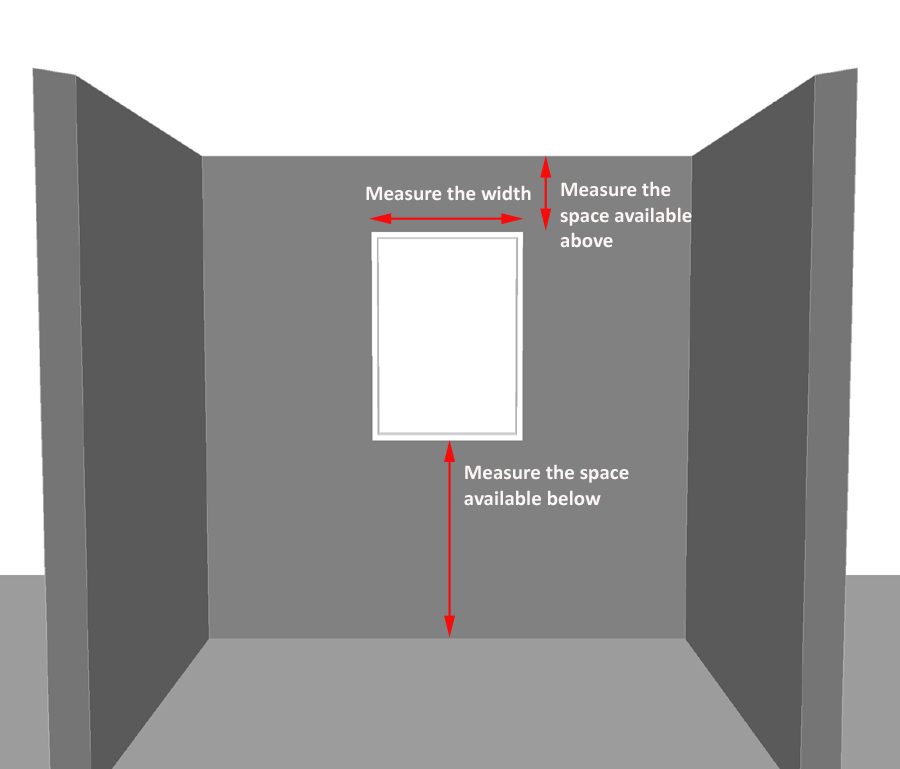 | | Step Two - Who's using the closet? - Now that you have all of the measurements that you require, it's time to start planning. - Firstly, think of who is going to be using the closet. Is it for one person or two? What will you require storage for? Dresses? Shoes? Toys? Folded garments? Whatever it is, make sure you consider this before you start designing. - We recommend that you start by making a check list of everything you require storage space for, in order of importance. This will help you decide what you need to dedicate most space to in your new closet. - We also recommend that you measure how much room your clothes take up with your current storage area. For example how wide is your current wardrobe? You will need at least this amount of space in your new closet, but bear in mind, if your ceiling height allows, you can halve this amount and include a two tier hanging area for short garments which will give you more space for storage of other items. - Will you need long hanging space for dresses? Do you fold any of your clothes? Do you need drawers? How many pairs of shoes do you have? Typically a woman's pair of shoes is 20cm/ 8" wide, and a man's pair of shoes is 25cm/ 10" wide. Consider the amount of space you will need based on these measurements for your shoes. Remember if you keep shoes in boxes, this measurement will be slightly bigger, but you can use regular flat shelving rather than angled shoe shelves.
- For this tutorial, we have designed a closet for two people to share. One woman and one man.
| |  | | Step Three - Create Order - Now that you have considered everything that you need, it's time to start designing your closet.
- We're designing this example for a man and a woman, and we're splitting each persons requirements, so that they each have a section of their own in the closet. - Typically, we find that women have more long hanging garments, and fold more garments than men do. - We find that men hang a lot more of their clothes, and their requirement for shelves is therefore less. Our design will reflect this. - We'll start with the woman's side of the closet. We're going to give her the left hand side wall. - This side of the closet will allow us to design a slightly bigger overall area, as the adjacent wall on the left hand side, has a larger return up to the doorway, allowing us to continue the storage section around the corner. | | 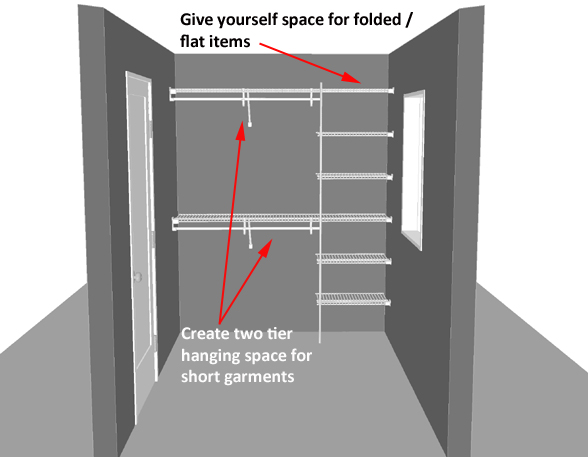 | | Step Four - Start designing! - Now is the fun part! Designing your closet needn't be a chore. A walk in wardrobe is a real luxury, even if it's only small, so have fun with it! - You'll need space for your short hanging garments and folded garments, so lets start there. - In this example the left hand side wall is 183cm/ 72" wide. We have therefore included a 61cm/ 24" wide section of shelving for folded and flat items. - The rest of the space we have used for two tier hanging space, which will be perfect for short garments such as blouses, skirts, jackets etc. - We recommend continuing the top shelf all the way along the entire width of the wall. This will give you plenty of storage space items which require less regular access, such as suitcases, hats, bags etc. | | 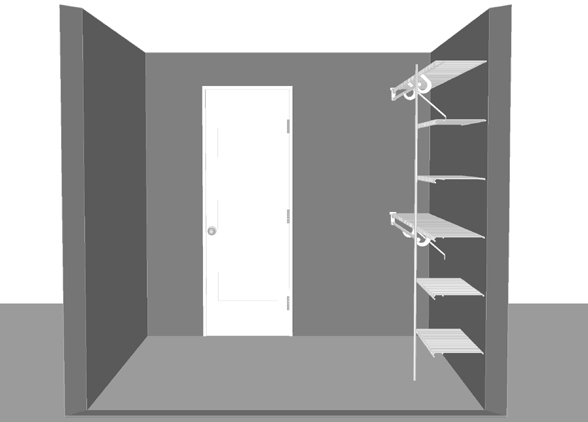 | | Step Four - Designing (cont'd) - Now that you have the first wall planned out, you can move onto the return wall. This is the adjacent wall which has some space behind the doorway for you to make use of. - A simple solution would be to create a long hanging space behind the door, for long coats and dresses etc. - This can then continue from the adjacent wall, around the corner using a SuperSlide corner hanger bar. - You will need to butt the shelf up to the top shelf from the first wall, and support the other end of the shelf with a shelf support bracket to provide adequate support. - The door way is a standard 720mm/ 28" door, leaving a space to the right of approximately 109cm/ 43". - Once you have allowed for the shelf on the adjacent wall, this will give you up to 76cm/ 30" of space for a long hanging section. | | 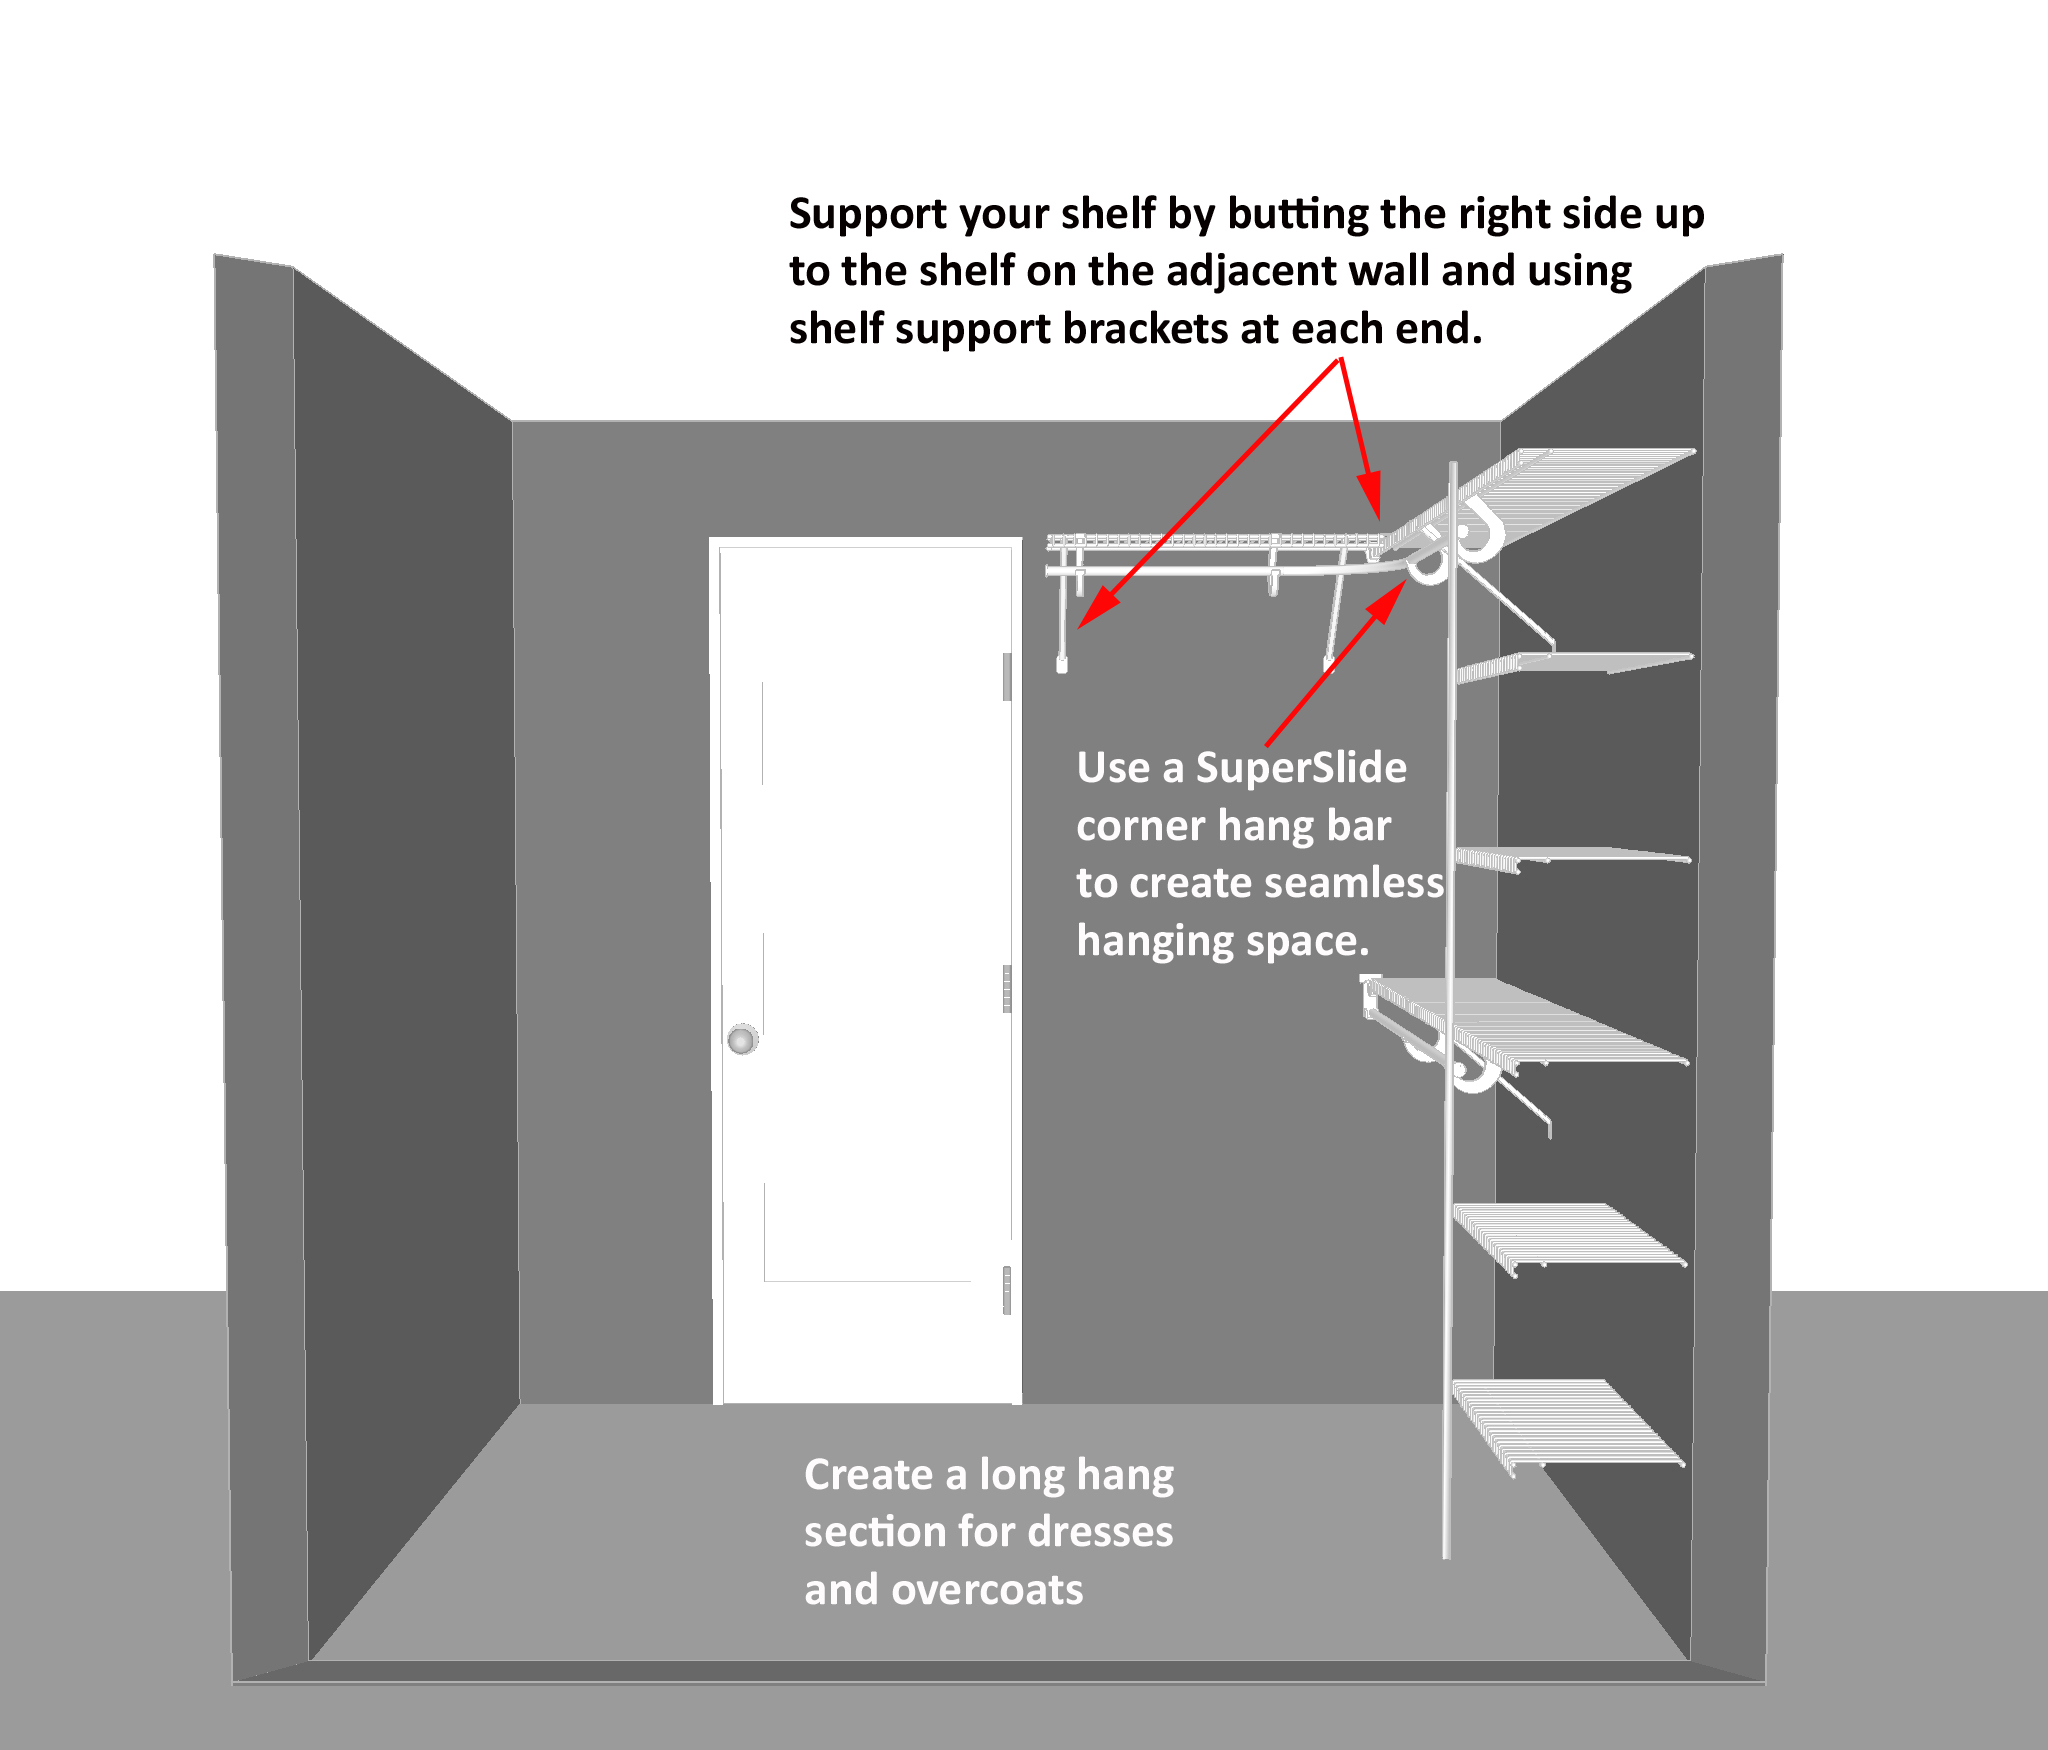 | | Step Four - Designing (cont'd) - Now that "her" side if complete, you can turn your attention to "his" side. - "His" side of the closet will be placed on the right hand side wall. Due to the position of the door in this example, you will not be able to create an L shape of storage space on this side too, but you will be able to use the whole width of the right hand side wall. - When creating a men's closet, we recommend including some three quarter length hanging space. This is ideal for storing smart trousers or jeans hung at the waistband, jackets and or suit jackets which tend to be longer than shirts etc. - A small amount of long hanging can also be placed for overcoats, although generally speaking; men have very few long hanging garments. In this design we have included a 50cm/ 19.6" wide section of long hanging space, a 61cm/ 24" wide section of three quarter length hanging a 78cm/ 30" wide section of two tier hanging for short garments. - An added bonus of creating different heights of hanging, is that you get to include additional shelving space above each section for flat and folded items. | | 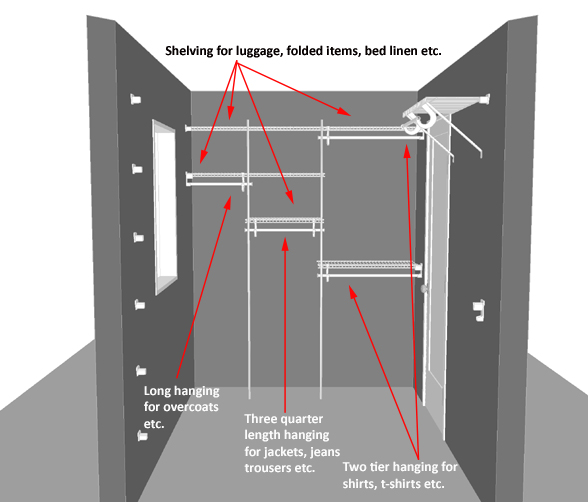 | | Step Four - Designing (cont'd) - Onto the last wall, and in this example there is a window which we need to work around. - Windows are common obstacles, but it doesn't mean you are unable to use the walls around them. - In this example, we have space above for a linen shelf, and space below for shoe racks. - You really need clearance of about 25cm/ 10" above your window to make a useful shelf, otherwise you'll end up storing sheets of paper and that's about it! - If your window is wider than 91cm/ 36", then we do not recommend that you have a shelf continuing above your window, as you will have too much of the shelf unsupported. But you could still place a shelf either side if your space allowed. - When placing shoe racks, make sure you take into account the space that the garments on each side wall will take up when they're hanging on the rails. Generally a garment on its hanger is 55cm/ 22" - 60cm/ 23" wide. Therefore we recommend that you take at least this amount away from your overall width to work out the space you are left with in between. - For this example it means we can place three shoe racks 76cm/ 30" wide. We have spaced them 25cm/ 10" apart. With ladies shoes around 20cm/ 8" wide and men's shoes around 25cm/ 10", this means you'll have space for approximately 3 - 4 pairs of shoes per rack. | | 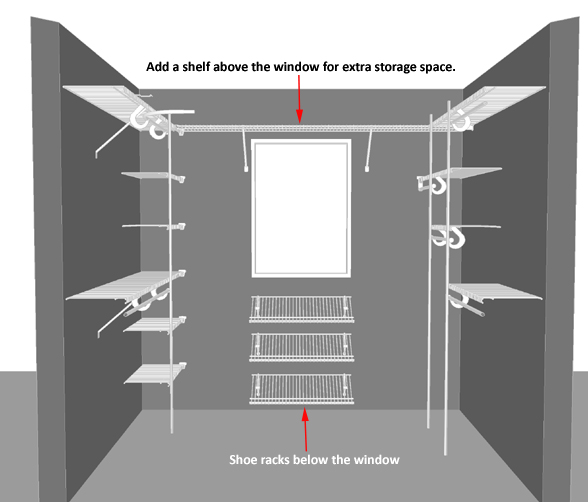 | | | | | | | | | | Your Completed Design! | | | | Back wall | Left hand side | Right hand side | 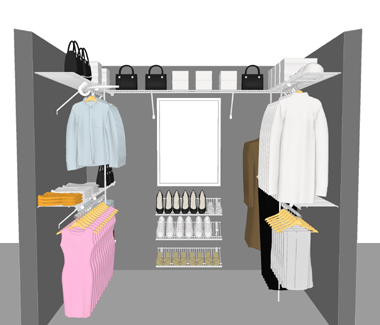 | 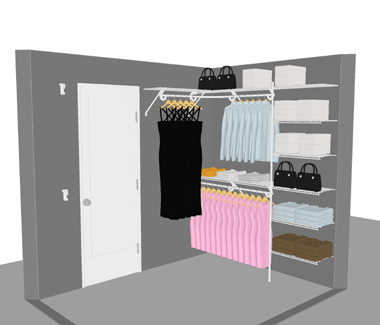 | 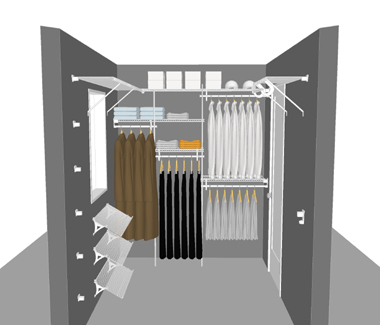 | Step Five - Let's go shopping! So now that you're happy with your design, it's time to work out all of the parts you need. We have created a shopping list for this closet below, with images and descriptions of each part to help you. You may also find our ClosetMaid Assembly page useful when figuring out what hardware you need. You can visit our Create Your Own walk in wardrobe section too where you'll find everything you need!
If you need any help though, give us a call. Our sales team will talk you through what you need and give you advice too! Call us on 01622 872 006 during office hours, or email us sales@organisemyhome.com in the evenings or at weekends for out of office assistance. This design used our 12" (30.5cm) deep SuperSlide shelving with our regular fix hardware. | Part # | Description | Quantity | Unit Price £ | Image | | 47198 | 2.44m / 8' length 30.5cm/ 12" deep SuperSlide shelving (Back wall above window) | 1 | 19.99 | 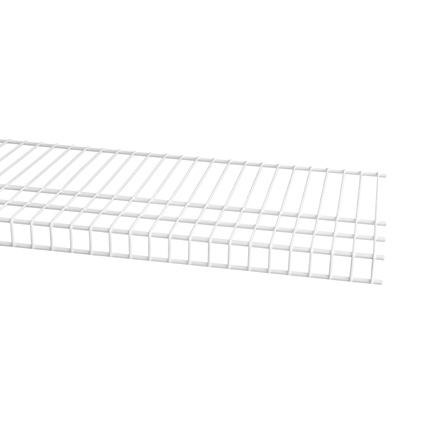 | | 47196 | 1.83m / 6' length 30.5cm/ 12" deep SuperSlide shelving (Two tier hanging on Left hand side & top shelf on Right hand side wall) | 3 | 14.99 | | | 47194 | 1.22m / 4' length 30.5cm/ 12" deep SuperSlide shelving (Two to be cut into 2 x 61cm / 2' shelves for left hand side wall shelving. One for long hanging section behind door, three for shoe racks below window, three for lower hanging sections on right hand side wall) | 9 | 9.99 | | | 2057 | 1.22m / 4' length SuperSlide hang bar (Lower hanging rail on left hand side wall) | 1 | 8.49 | 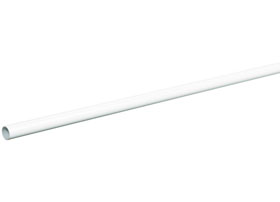 | | 2056 | 0.91m / 3' length SuperSlide hang bar (Remainder of hanging sections) | 6 | 6.49 | | | 5649 | SuperSlide corner hanger bar. Only for use when you have a right angle corner. Connects between two regular lengths of SuperSlide hang bar. (Use between top tier of two tier hanging on left hand side wall, and long hanging behind the door) | 1 | 5.99 |  | | 1164 | Shelf Support Bracket 30.5cm / 12" position. Use these at the end of any open shelf where shelf support poles are not used, or as supports at corners, or mid supports when a shelf is more than 91cm / 36" wide. | 7 | 2.49 | 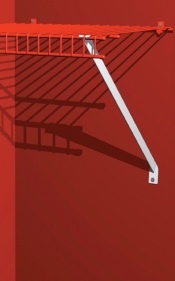 | | 1009 | Shelf Support Pole. Use to support three or more shelves as an end support where no side wall is available to fix to, or as a mid support when shelves span more than 91cm / 36" wide. | 3 | 19.99 | 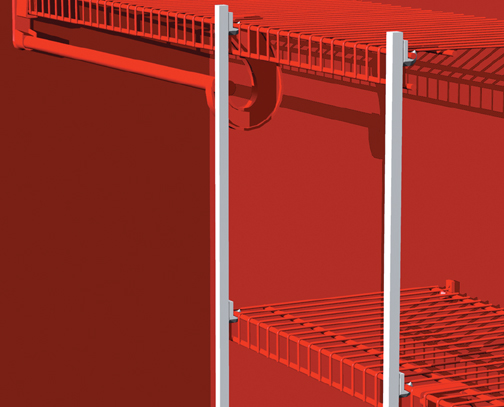 | | 120 | Corner support bracket. Use to support the corners where two shelves at right angles butt up to one another. 1 Per join | 3 | 1.99 |  | | 974 | Wall Bracket. Supports the end of a shelf only when fixing to available side wall. | 8 | 0.99 |  | | 980 | SuperSlide Wall Bracket. Support the end of a SuperSlide shelf with hang bar below when fixing to available side wall. | 4 | 1.99 |  | | 5647 | SuperSlide Hanger Bar Support. Use every 91cm / 36" along the length of a hang bar, as well as at each end where hang bar does not fix to a side wall, and either end of a SuperSlide corner hanger bar. | 11 | 1.59 |  | | 2081 | SuperSlide Internal Hang Bar End Cap. For use at the end of hang bars which are "open ended" | 8 | 1.75 |  | | 2083 | SuperSlide External Hang Bar End Cap. For use at the end of hang bars which butt up to walls or slot into SuperSlide wall brackets. | 4 | 0.25 |  | | 923 | Shoe Shelf Support. One required at each end of the shoe rack and every 91cm / 36" in between if required. | 6 | 2.49 |  | | 203 | Small Plastic End Caps. These end caps finish off the shelving neatly, particularly when you need to trim shelves to your exact size. You will need 10 per shelf. | 150 | 0.06 |  | | 991 | Wall Clips. These are vital for fixing the shelf to the wall. You will need one at each end of the shelf, and then one approximately 25cm - 30cm / 10" - 12" apart in between. | 68 | 0.30 |  | | Grand Total | £384.37 | We hope that this tutorial has been helpful, but please do not hesitate to contact us with any questions you may have! |